 Fabric Journal Cover
Last fall I took a class on how to make fabric journals. I was hooked before the first hour was even up! I learned some very interesting tips and tricks along the way that I will share in this post. 

First, we chose a color scheme. The instructor of the class was all about vintage looks and color, so I thought I would give that a try. It was actually a challenge for me, as I normally gravitate towards bright splashes of vibrant color. But I soon found that the muted tones of the vintage look were soothing, and began to enjoy playing with the creams, tans, pinks and pale blues. 

The beginning of the process is about selecting the fabric or papers for the pages of your book. A useful tip is to vary the size and the type of "page" you are using. I chose felt, canvas, watercolor paper, tissue paper and cloth to make pages. Our instructor cautioned against having me than 5 separate pages (makes 20 half pages) as your book will get quite thick. Being a consummate rule breaker, I had to do a few more…. and later learned that she was right! Once you have chosen the substances for your pages, it is fun to vary the size of them - little pages nestled into bigger pages creates a lovely visual effect.


The next step is to begin building the pages. I gathered my lovely stash of vintage looking ephemera and went to town. The most common building blocks of pages were lace, burlap, ledger papers, music, pretty scraps of paper and ribbons. The fabric journals are so fun, because you can sew much of the design right into the books. There is a trick to this though…. and it is planning your pages. If you sew onto one side of the page, when you flip it the sewing will be on the reverse side. That may be an element that you want to see, or it may be something you wish to hide. If you want to hide it, you can sew your ephemera together, and then glue it down to the page, covering the existing sewing. 

I had fun adding some personal touches - like a check that my grandmother had written to me over 20 years ago. I also added in birth announcements and fun little envelope pockets like the one above to store special mementos inside of. 

Many of the pages have blank spaces in which to journal. I added these journaling blanks throughout the book so it COULD be used as a journal. I knew this one would be a book that I kept so I felt comfortable adding in my personal memorabilia and will add the journaling that is significant to certain events that happened in my life. 

On pages that were made from watercolor paper, I did a soft wash of vintage colors on them. I also stenciled in soft patterns to add to the visual interest of the piece. 
See how the smaller page nestles nicely into the larger page? How fun! Look at the white circle on the page above - that is actually a wax seal. I dropped hot white wax onto the book and sealed it with a metal tool. After sewing on, or gluing on my main elements I often added additional 3-d type of embellishments like brads, buttons, and metal ephemera. This gave the book some heft as well as some additional layers of texture to enjoy. 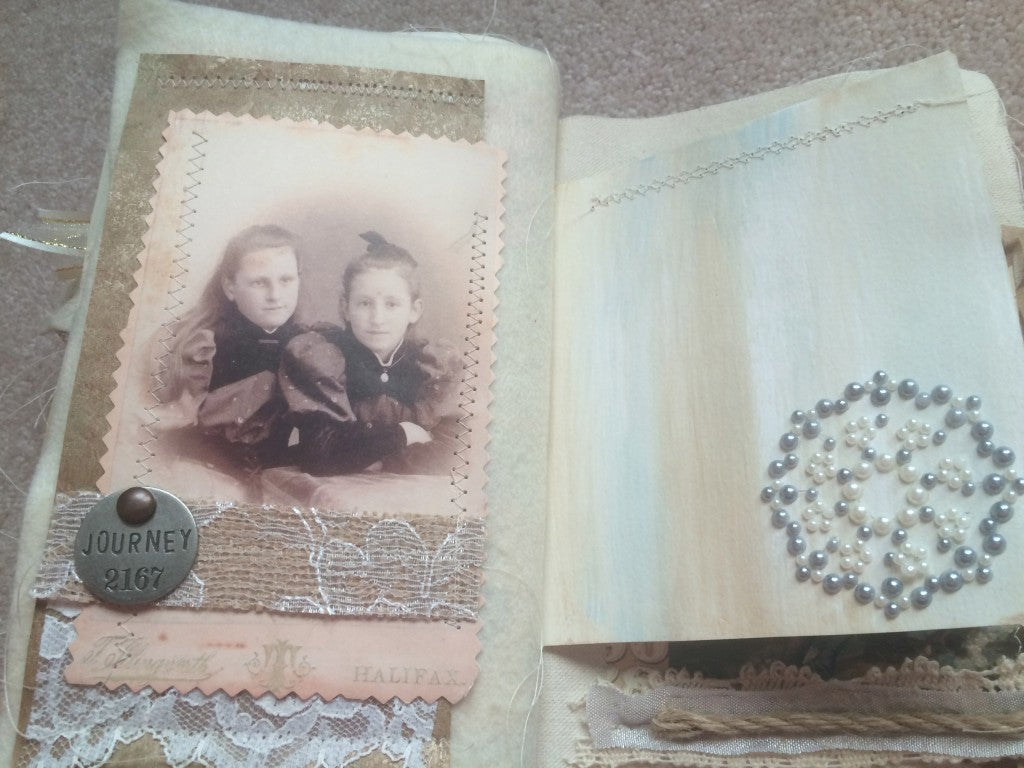

This final page above has a butterfly attached to a bookmark I created to stick right into the paper pocket I had crafted. Below is the back cover of the book. After compiling all of the pages, I cut 3 small holes for a binding and bound it with heavy embroidery thread. I hope you enjoyed learning about how I made this fun and fabulous fabric journal, and that the pictures brought a bit of beauty into your world! 


