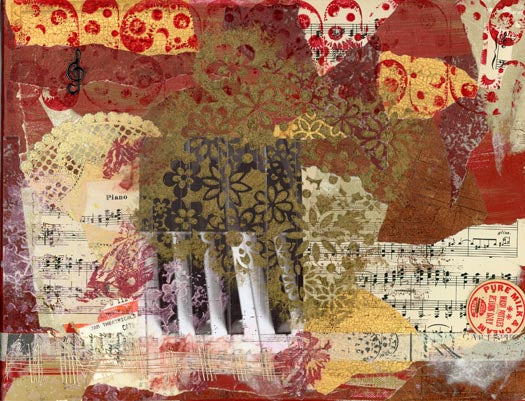
Sometimes the basic colors of black and white fascinate me. The symmetry of piano keys can beautiful. I wanted to meld the perfect alignment of ebony and ivory with chaos and color!
This was my first experiment with using photoshop to merge a canvas. For all of you artsy followers, this was a ton of fun! The canvas itself was too big to fit on a scanner, so I had to scan it in 4 parts. Photoshop Elements allows you to bring all four scans into one piece and "stitches" them together perfectly for you! The technology is simply amazing!
I used my new scanner, the
Epson Perfection V600 Photo Color Scanner 
. I was amazed at the color match - I didn't have to adjust color settings at all - and it was a perfect color match for the actual painting. VERY impressed with that!
I love how you can see the actual texture of the real painting also. Fun for me. Hopefully inspiring for you!
Anyone interested in the PhotoMerge steps - read on!
1. Set your scanner settings to at least 350 dpi so you have a good high resolution scan to save.
2. Scan in as many parts as you need to and save each scan separately.
3. Open photoshop elements editor. Select File, select new, select Photomerge panorama.
4. Under the Layout options, choose auto. Then click the browse oval on the right to open the files that you just scanned.
5. Select the scans you want to merge together. Click Open.
6. Check the boxes for Blend Images Together and Vignette Removal. Click Ok. Let it do its thing!
7. Make sure you flatten your images (Found under the Layers Menu bar) and Crop it (Found under the Image Menu Bar).
8. Save it at whatever size you want! Voila - a large canvas is now a cohesive single high resolution print!

 Sometimes music lifts us up. Sometimes it haunts us. Sometimes the elusive melody takes our hearts to a place where the answer is just out of reach...a swirling mystery. What does this painting evoke for you?

 . I was amazed at the color match - I didn't have to adjust color settings at all - and it was a perfect color match for the actual painting. VERY impressed with that!
I love how you can see the actual texture of the real painting also. Fun for me. Hopefully inspiring for you!
Anyone interested in the PhotoMerge steps - read on!
1. Set your scanner settings to at least 350 dpi so you have a good high resolution scan to save.
2. Scan in as many parts as you need to and save each scan separately.
3. Open photoshop elements editor. Select File, select new, select Photomerge panorama.
4. Under the Layout options, choose auto. Then click the browse oval on the right to open the files that you just scanned.
5. Select the scans you want to merge together. Click Open.
6. Check the boxes for Blend Images Together and Vignette Removal. Click Ok. Let it do its thing!
7. Make sure you flatten your images (Found under the Layers Menu bar) and Crop it (Found under the Image Menu Bar).
8. Save it at whatever size you want! Voila - a large canvas is now a cohesive single high resolution print!
. I was amazed at the color match - I didn't have to adjust color settings at all - and it was a perfect color match for the actual painting. VERY impressed with that!
I love how you can see the actual texture of the real painting also. Fun for me. Hopefully inspiring for you!
Anyone interested in the PhotoMerge steps - read on!
1. Set your scanner settings to at least 350 dpi so you have a good high resolution scan to save.
2. Scan in as many parts as you need to and save each scan separately.
3. Open photoshop elements editor. Select File, select new, select Photomerge panorama.
4. Under the Layout options, choose auto. Then click the browse oval on the right to open the files that you just scanned.
5. Select the scans you want to merge together. Click Open.
6. Check the boxes for Blend Images Together and Vignette Removal. Click Ok. Let it do its thing!
7. Make sure you flatten your images (Found under the Layers Menu bar) and Crop it (Found under the Image Menu Bar).
8. Save it at whatever size you want! Voila - a large canvas is now a cohesive single high resolution print!